Ok, so I have had this post in the oven for months now, and I really need to get it out. It is already Wednesday in New Zealand, but it is still Tuesday in some parts of the world, so I figured I can get away with it. You can see this is old, since I used the same pink Beiroa swatch from the post on lifelines from November. That said, let’s get to business.
So, what is duplicate stitch?
duplicate stitch n a colourwork technique or the type of stitch applied in said technique, which allows to decorate knit fabric with a motive. It consists of embroidering stitches over the already existing knit stitches, which remain hidden behind the contrasting colour yarn used.
Although this somewhat improvised Knitionary definition may give the impression that duplicate stitch is complicated, to me it is the easiest way of adding colour to one’s knitting. This makes it the ideal technique for beginners to create their first colourwork project. Of course, having some previous experience in embroidery techniques, especially cross-stitch is an advantage.
Here is how it goes:
You’ll need 1) a blunt yarn needle – the same you use for weaving in yarn ends should do – 2) contrasting colour yarn in the same or heavier weight than that of the knit fabric, 3) a design on your mind, and – preferably – on graph paper.
Also, if you’ve just finished knitting, it’s best to block your piece first (wash/dampen it and allow to dry).
Ready? Now, study your knit fabric. Notice the V shaped stitches that make up stockinette. These are what you’ll have to “duplicate”.
What is especially cool about duplicate stitch is that it allows you to decorate a piece which is already finished, so in a way you can use this for afterthought personalization or simply to spice up a somewhat boring object. Note that contrasting colour duplicate stitches create a double thickness for the fabric, so they don’t blend into your work as Fair Isle proper. For this reason, I think it is best to use the technique to add smaller or compact motives, keeping in mind that the thicker your yarn, the more it will stand out. Oh, and if you don’t like the result, you can always simply remove your duplicate stitch motive.
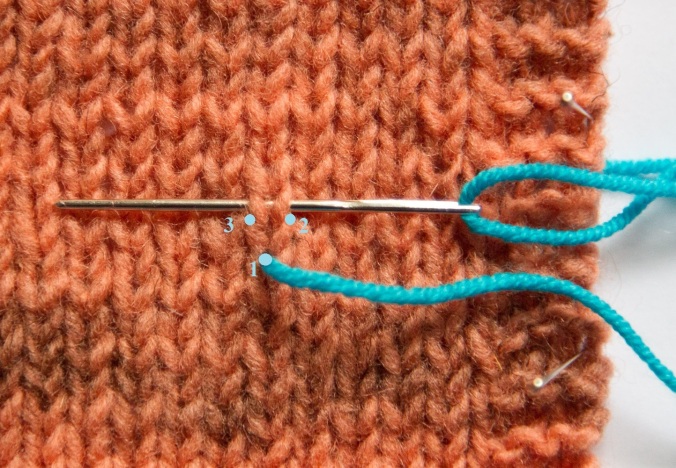
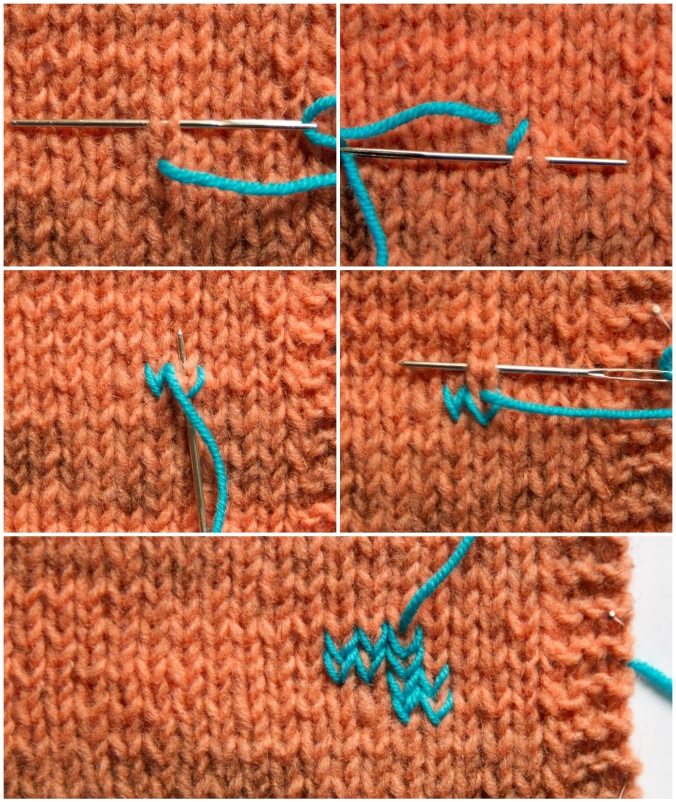
This image shows the way your needle and yarn has to travel to duplicate a knit stitch
And now, let’s see how it works:
- Starting from the wrong side pull the needle through the bottom of the first stitch you want to duplicate
- Insert the needle from right to left through both loops of the stitch above
- Pull the yarn through gently – now you’ll have the right “leg” of the stitch covered by the contrasting yarn
- Bring the needle through the same place you started the stitch, only, this time you go from the right side to the wrong side of the fabric – one stitch done!
- Pop the needle out through the bottom of the next stitch you want to cover
- Repeat 1-4 until finished
That easy!
Now, in advancing with the motive to be embroidered on the knit fabric it is generally advised to go from left to right, and from the bottom to the top. However, depending on your motive, you might find that it is not necessarily straightforward to go in these directions. Don’t worry. Just keep duplicating stitches, and aim for your duplicates to stay even – don’t pull on the yarn too much.
In sum:
For horizontal stitches aim to go from left to right, i.e. once a stitch is finished, pull your needle through the bottom of the next stitch to the right.
For vertical stitches aim to go bottom up, i.e. once a you’ve finished a stitch, pull the needle through the bottom of the stitch right above.
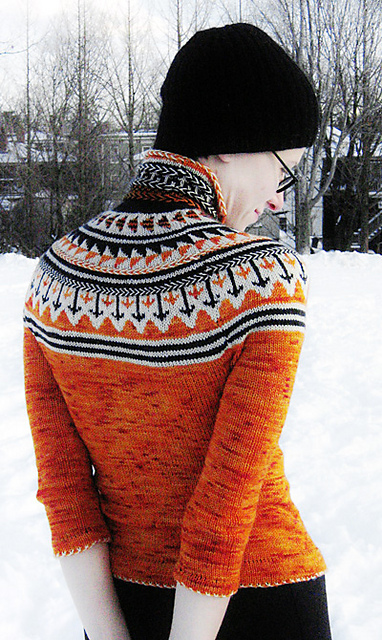
And finally, some motivation:
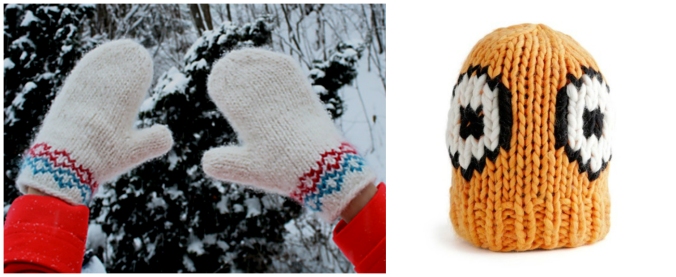
On the right: Warm winter mitts by Anna and Heidi Pickles (free pattern)
On the left: The all so popular Giles Eek Hat by WTG also uses duplicate stitch!